


腾讯云 Elasticsearch 服务提供在用户 VPC 内通过私有网络 VIP 访问集群的方式,用户可通过 Elasticsearch REST Client 编写代码访问集群并将自己的数据导入到集群中,也可以通过官方提供的组件(如 logstash 和 beats)接入自己的数据。
本文以官方提供的组件 logstash 和 beats 为例,介绍不同类型的数据源接入 ES 的方式。
准备工作
因访问 ES 集群需要在用户 VPC 内进行,因此用户需要创建一台和 ES 集群相同 VPC 下的 CVM 实例或者 Docker 集群。
使用 logstash 接入 ES 集群
CVM 中访问 ES 集群
1. 安装部署 logstash 与 java8。
wget https://artifacts.elastic.co/downloads/logstash/logstash-5.6.4.tar.gztar xvf logstash-5.6.4.tar.gzyum install java-1.8.0-openjdk java-1.8.0-openjdk-devel -y
注意
logstash 版本建议与 Elasticsearch 版本保持一致。
2. 根据数据源类型自定义配置文件
*.conf,配置文件内容可参考 数据源配置文件说明。3. 执行 logstash。
nohup .//root/logstash-5.6.4/bin/logstash -f ~/*.conf 2>&1 >/dev/null &
Docker 中访问 ES 集群
自建 Docker 集群
1. 拉取 logstash 官方镜像。
docker pull docker.elastic.co/logstash/logstash:5.6.9
2. 根据数据源类型自定义配置文件
*.conf,放置在 /usr/share/logstash/pipeline/目录下,目录可自定义。3. 运行 logstash。
docker run --rm -it -v ~/pipeline/:/usr/share/logstash/pipeline/ docker.elastic.co/logstash/logstash:5.6.9
使用腾讯云容器服务
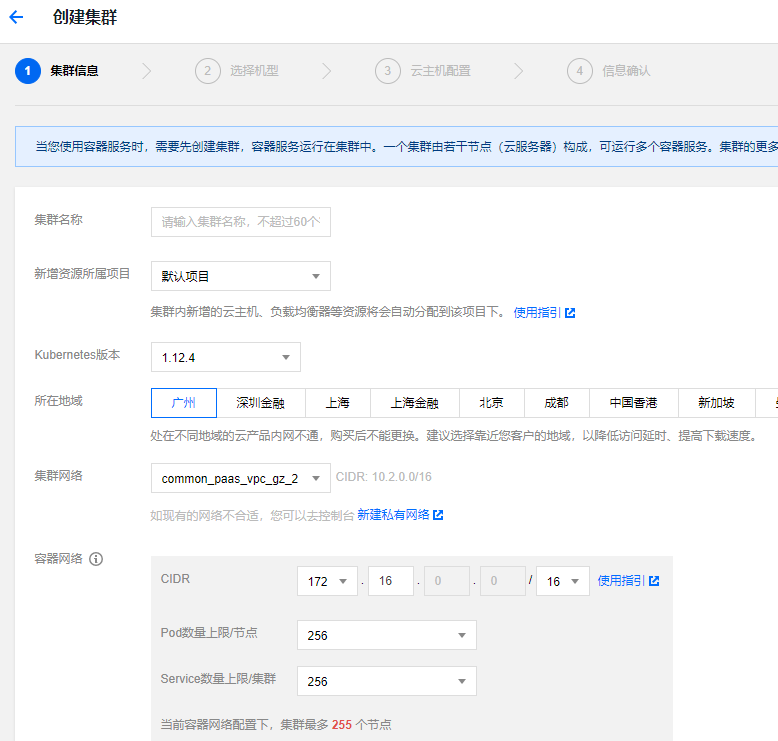
腾讯云 Docker 集群运行于 CVM 实例上,所以需要先在容器服务控制台上创建 CVM 集群。
1. 登录 容器服务控制台,选择左侧菜单栏集群 > 新建,创建集群。
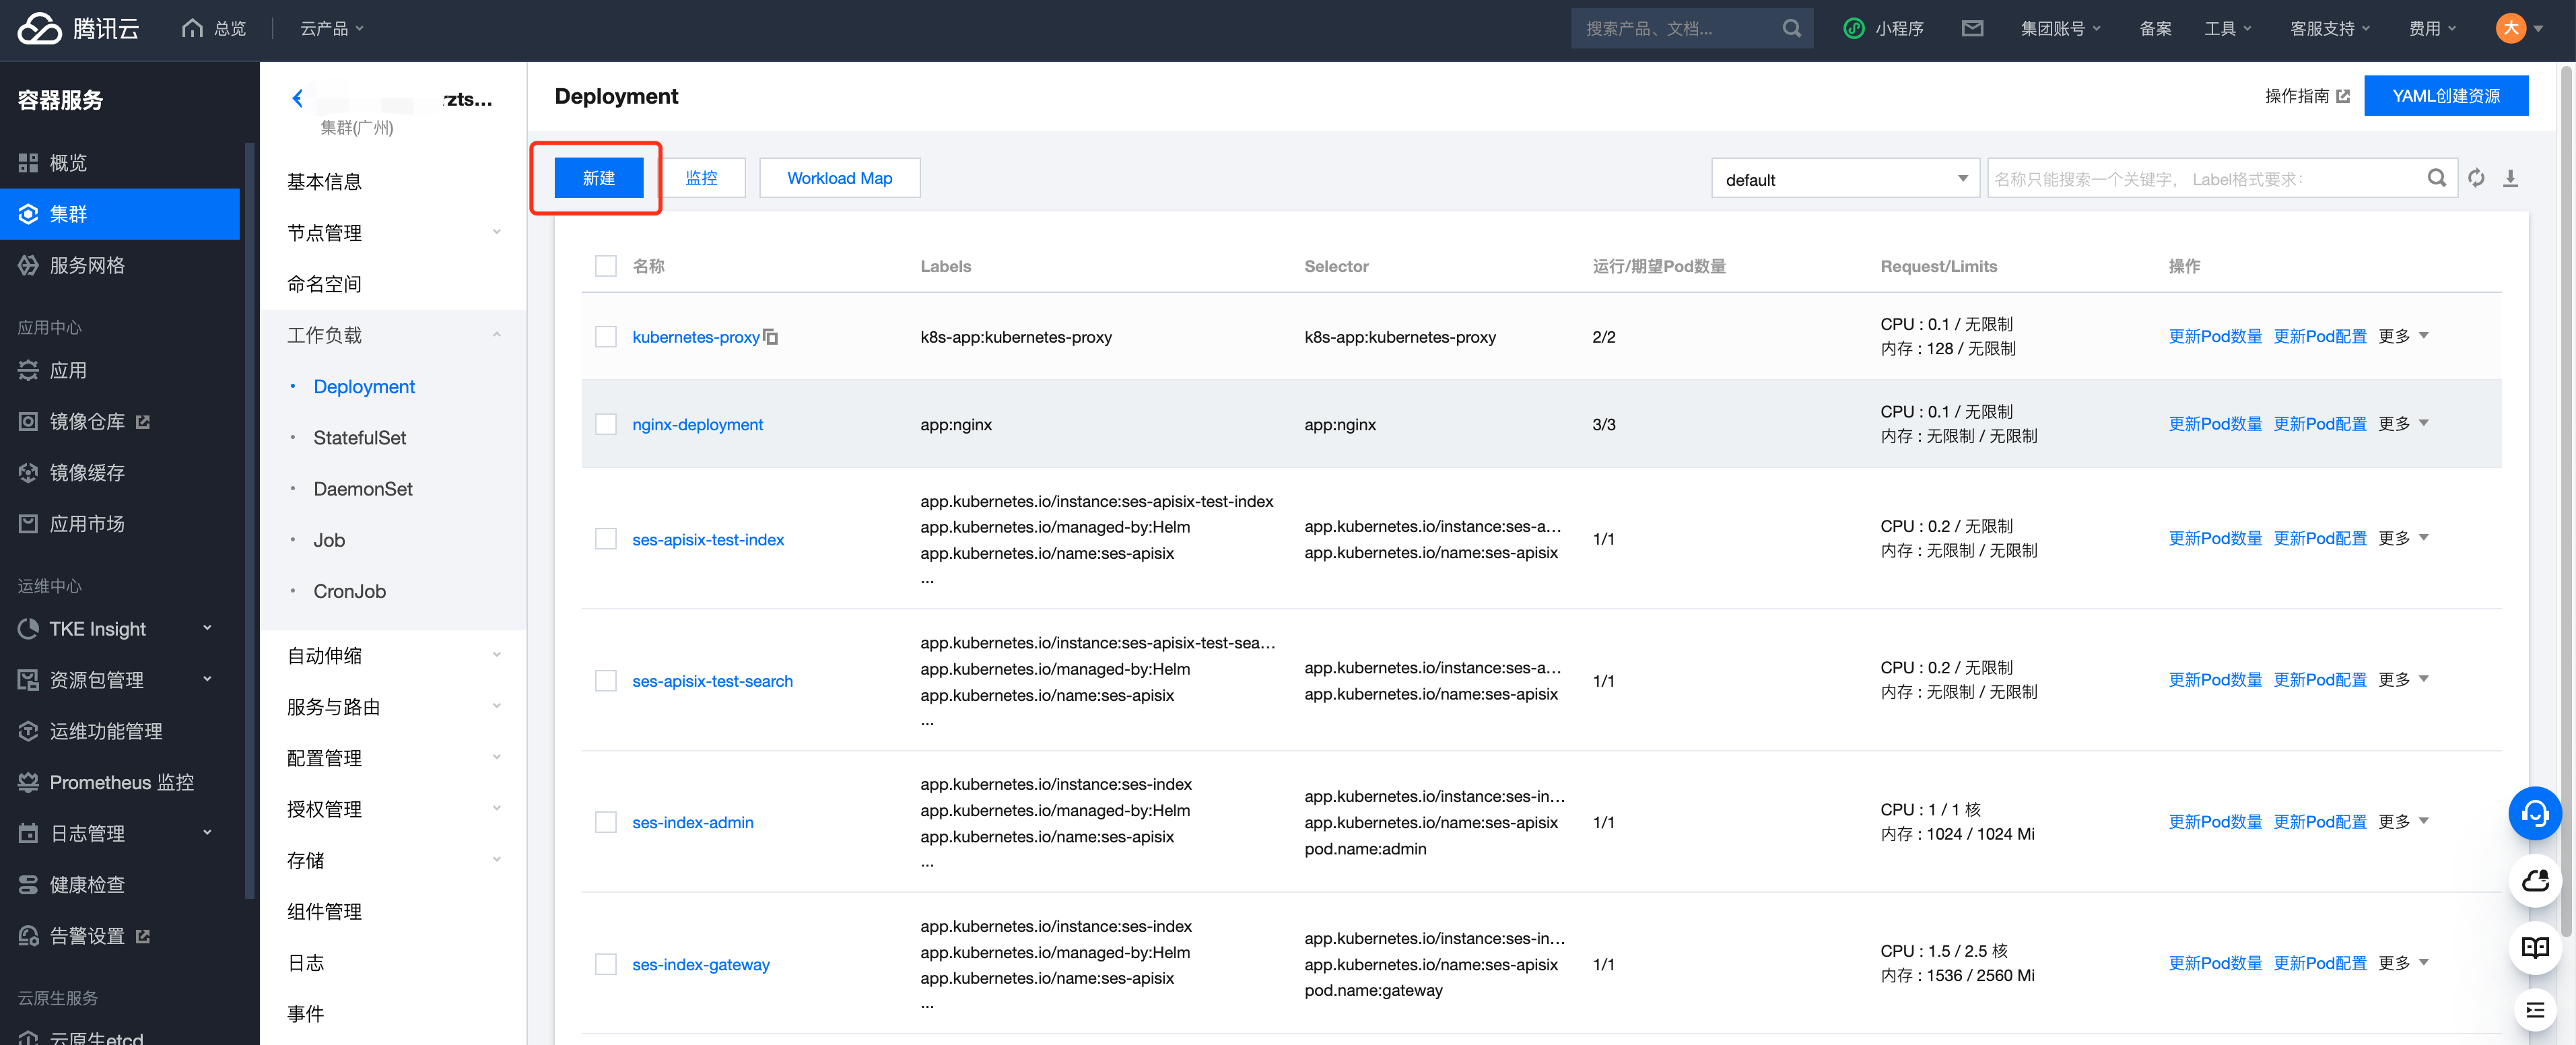
2. 选择左侧菜单栏服务,单击新建创建服务。
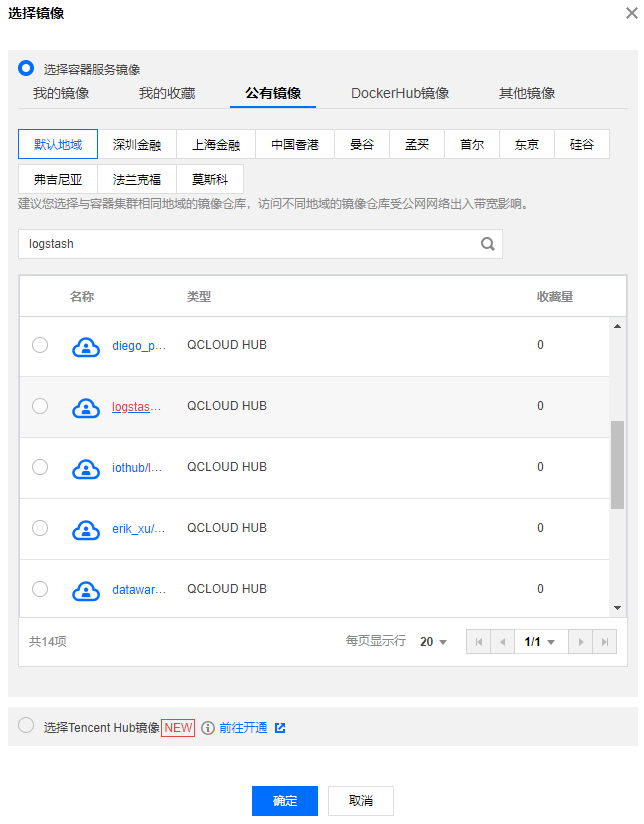
3. 选取 logstash 镜像。
本例中使用 TencentHub 镜像仓库提供的 logstash 镜像,用户也可以自行创建 logstash 镜像。
4. 创建数据卷。
创建存放 logstash 配置文件的数据卷,本例中在 CVM 的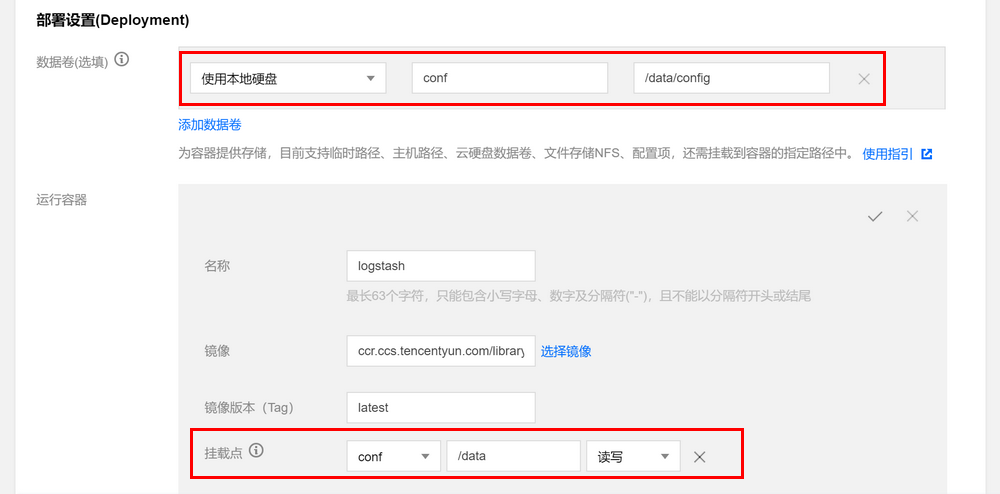
/data/config目录下添加了名为 logstash.conf 的配置文件,并将其挂在到 Docker 的/data目录下,从而使得容器启动时可以读取到 logstash.conf 文件。
5. 配置运行参数。
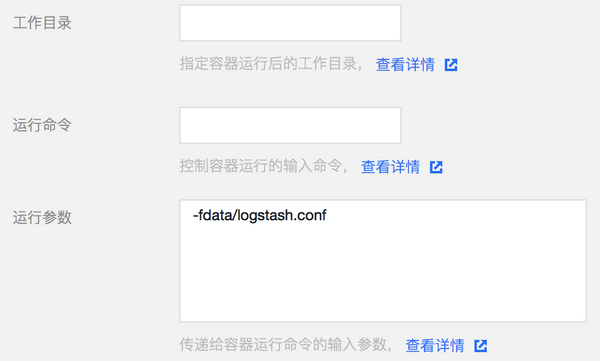
6. 根据需要配置服务参数并创建服务。

配置文件说明
File 数据源
input {file {path => "/var/log/nginx/access.log" # 文件路径}}filter {}output {elasticsearch {hosts => ["http://172.16.0.89:9200"] # Elasticsearch 集群的内网 VIP 地址和端口index => "nginx_access-%{+YYYY.MM.dd}" # 自定义索引名称,以日期为后缀,每天生成一个索引}}
Kafka 数据源
input{kafka{bootstrap_servers => ["172.16.16.22:9092"]client_id => "test"group_id => "test"auto_offset_reset => "latest" #从最新的偏移量开始消费consumer_threads => 5decorate_events => true #此属性会将当前 topic、offset、group、partition 等信息也带到 message 中topics => ["test1","test2"] #数组类型,可配置多个 topictype => "test" #数据源标记字段}}?output {elasticsearch {hosts => ["http://172.16.0.89:9200"] # Elasticsearch 集群的内网 VIP 地址和端口index => "test_kafka"}}
JDBC 连接的数据库数据源
input {jdbc {# mysql 数据库地址jdbc_connection_string => "jdbc:mysql://172.16.32.14:3306/test"# 用户名和密码jdbc_user => "root"jdbc_password => "Elastic123"# 驱动 jar 包,如果自行安装部署 logstash 需要下载该 jar,logstash 默认不提供jdbc_driver_library => "/usr/local/services/logstash-5.6.4/lib/mysql-connector-java-5.1.40.jar"# 驱动类名jdbc_driver_class => "com.mysql.jdbc.Driver"jdbc_paging_enabled => "true"jdbc_page_size => "50000"# 执行的sql 文件路径+名称#statement_filepath => "test.sql"# 执行的sql语句statement => "select * from test_es"# 设置监听间隔 各字段含义(由左至右)分、时、天、月、年,全部为*默认含义为每分钟都更新schedule => "* * * * *"type => "jdbc"}}?output {elasticsearch {hosts => ["http://172.16.0.30:9200"]index => "test_mysql"document_id => "%{id}"}}
使用 Beats 接入 ES 集群
Beats 包含多种单一用途的采集器,这些采集器比较轻量,可以部署并运行在服务器中收集日志、监控等数据,相对 logstash,Beats 占用系统资源较少。
Beats 包含用于收集文件类型数据的 FileBeat、收集监控指标数据的 MetricBeat、收集网络包数据的 PacketBeat 等,用户也可以基于官方的 libbeat 库根据自己的需求开发自己的 Beats 组件。
CVM 中访问 ES 集群
1. 安装部署 filebeat。
wget https://artifacts.elastic.co/downloads/beats/filebeat/filebeat-5.6.4-linux-x86_64.tar.gztar xvf filebeat-5.6.4-linux-x86_64.tar.gz
2. 配置 filebeat.yml。
配置 filebeat.yml 参考示例:
################### Filebeat Configuration Example #########################?############################# Filebeat ######################################filebeat:# List of prospectors to fetch data.prospectors:# Each - is a prospector. Below are the prospector specific configurations-# Paths that should be crawled and fetched. Glob based paths.# To fetch all ".log" files from a specific level of subdirectories# /var/log/*/*.log can be used.# For each file found under this path, a harvester is started.# Make sure not file is defined twice as this can lead to unexpected behaviour.# 指定要监控的日志,可以指定具体得文件或者目录paths:- /var/log/*.log (这是默认的,可以自行修改,例如放在/home/hadoop/app.log里)#- c:\\programdata\\elasticsearch\\logs\\*?# Configure the file encoding for reading files with international characters# following the W3C recommendation for HTML5 (http://www.w3.org/TR/encoding).# Some sample encodings:# plain, utf-8, utf-16be-bom, utf-16be, utf-16le, big5, gb18030, gbk,# hz-gb-2312, euc-kr, euc-jp, iso-2022-jp, shift-jis, ...# 指定被监控的文件的编码类型,使用plain和utf-8都是可以处理中文日志的#encoding: plain?# Type of the files. Based on this the way the file is read is decided.# The different types cannot be mixed in one prospector## Possible options are:# * log: Reads every line of the log file (default)# * stdin: Reads the standard in# 指定文件的输入类型log(默认)或者stdininput_type: log?# Exclude lines. A list of regular expressions to match. It drops the lines that are# matching any regular expression from the list. The include_lines is called before# 在输入中排除符合正则表达式列表的那些行。# exclude_lines. By default, no lines are dropped.# exclude_lines: ["^DBG"]?# Include lines. A list of regular expressions to match. It exports the lines that are# matching any regular expression from the list. The include_lines is called before# exclude_lines. By default, all the lines are exported.# 包含输入中符合正则表达式列表的那些行(默认包含所有行),include_lines执行完毕之后会执行exclude_lines# include_lines: ["^ERR", "^WARN"]?# Exclude files. A list of regular expressions to match. Filebeat drops the files that# are matching any regular expression from the list. By default, no files are dropped.# 忽略掉符合正则表达式列表的文件# exclude_files: [".gz$"]?# Optional additional fields. These field can be freely picked# to add additional information to the crawled log files for filtering# 向输出的每一条日志添加额外的信息,比如“level:debug”,方便后续对日志进行分组统计。# 默认情况下,会在输出信息的fields子目录下以指定的新增fields建立子目录,例如fields.level# 这个得意思就是会在es中多添加一个字段,格式为 "filelds":{"level":"debug"}#fields:# level: debug# review: 1?# Set to true to store the additional fields as top level fields instead# of under the "fields" sub-dictionary. In case of name conflicts with the# fields added by Filebeat itself, the custom fields overwrite the default# fields.# 如果该选项设置为true,则新增fields成为顶级目录,而不是将其放在fields目录下。# 自定义的field会覆盖filebeat默认的field# 如果设置为true,则在es中新增的字段格式为:"level":"debug"#fields_under_root: false?# Ignore files which were modified more then the defined timespan in the past.# In case all files on your system must be read you can set this value very large.# Time strings like 2h (2 hours), 5m (5 minutes) can be used.# 可以指定Filebeat忽略指定时间段以外修改的日志内容,比如2h(两个小时)或者5m(5分钟)。#ignore_older: 0?# Close older closes the file handler for which were not modified# for longer then close_older# Time strings like 2h (2 hours), 5m (5 minutes) can be used.# 如果一个文件在某个时间段内没有发生过更新,则关闭监控的文件handle。默认1h#close_older: 1h?# Type to be published in the 'type' field. For Elasticsearch output,# the type defines the document type these entries should be stored# in. Default: log# 设定Elasticsearch输出时的document的type字段 可以用来给日志进行分类。Default: log#document_type: log?# Scan frequency in seconds.# How often these files should be checked for changes. In case it is set# to 0s, it is done as often as possible. Default: 10s# Filebeat以多快的频率去prospector指定的目录下面检测文件更新(比如是否有新增文件)# 如果设置为0s,则Filebeat会尽可能快地感知更新(占用的CPU会变高)。默认是10s#scan_frequency: 10s?# Defines the buffer size every harvester uses when fetching the file# 每个harvester监控文件时,使用的buffer的大小#harvester_buffer_size: 16384?# Maximum number of bytes a single log event can have# All bytes after max_bytes are discarded and not sent. The default is 10MB.# This is especially useful for multiline log messages which can get large.# 日志文件中增加一行算一个日志事件,max_bytes限制在一次日志事件中最多上传的字节数,多出的字节会被丢弃#max_bytes: 10485760?# Mutiline can be used for log messages spanning multiple lines. This is common# for Java Stack Traces or C-Line Continuation# 适用于日志中每一条日志占据多行的情况,比如各种语言的报错信息调用栈#multiline:?# The regexp Pattern that has to be matched. The example pattern matches all lines starting with [# 多行日志开始的那一行匹配的pattern#pattern: ^\\[?# Defines if the pattern set under pattern should be negated or not. Default is false.# 是否需要对pattern条件转置使用,不翻转设为true,反转设置为false。 【建议设置为true】#negate: false?# Match can be set to "after" or "before". It is used to define if lines should be append to a pattern# that was (not) matched before or after or as long as a pattern is not matched based on negate.# Note: After is the equivalent to previous and before is the equivalent to to next in Logstash# 匹配pattern后,与前面(before)还是后面(after)的内容合并为一条日志#match: after?# The maximum number of lines that are combined to one event.# In case there are more the max_lines the additional lines are discarded.# Default is 500# 合并的最多行数(包含匹配pattern的那一行)#max_lines: 500?# After the defined timeout, an multiline event is sent even if no new pattern was found to start a new event# Default is 5s.# 到了timeout之后,即使没有匹配一个新的pattern(发生一个新的事件),也把已经匹配的日志事件发送出去#timeout: 5s?# Setting tail_files to true means filebeat starts readding new files at the end# instead of the beginning. If this is used in combination with log rotation# this can mean that the first entries of a new file are skipped.# 如果设置为true,Filebeat从文件尾开始监控文件新增内容,把新增的每一行文件作为一个事件依次发送,# 而不是从文件开始处重新发送所有内容#tail_files: false?# Backoff values define how agressively filebeat crawls new files for updates# The default values can be used in most cases. Backoff defines how long it is waited# to check a file again after EOF is reached. Default is 1s which means the file# is checked every second if new lines were added. This leads to a near real time crawling.# Every time a new line appears, backoff is reset to the initial value.# Filebeat检测到某个文件到了EOF(文件结尾)之后,每次等待多久再去检测文件是否有更新,默认为1s#backoff: 1s?# Max backoff defines what the maximum backoff time is. After having backed off multiple times# from checking the files, the waiting time will never exceed max_backoff idenependent of the# backoff factor. Having it set to 10s means in the worst case a new line can be added to a log# file after having backed off multiple times, it takes a maximum of 10s to read the new line# Filebeat检测到某个文件到了EOF之后,等待检测文件更新的最大时间,默认是10秒#max_backoff: 10s?# The backoff factor defines how fast the algorithm backs off. The bigger the backoff factor,# the faster the max_backoff value is reached. If this value is set to 1, no backoff will happen.# The backoff value will be multiplied each time with the backoff_factor until max_backoff is reached# 定义到达max_backoff的速度,默认因子是2,到达max_backoff后,变成每次等待max_backoff那么长的时间才backoff一次,# 直到文件有更新才会重置为backoff# 根据现在的默认配置是这样的,每隔1s检测一下文件变化,如果连续检测两次之后文件还没有变化,下一次检测间隔时间变为10s#backoff_factor: 2?# This option closes a file, as soon as the file name changes.# This config option is recommended on windows only. Filebeat keeps the files it's reading open. This can cause# issues when the file is removed, as the file will not be fully removed until also Filebeat closes# the reading. Filebeat closes the file handler after ignore_older. During this time no new file with the# same name can be created. Turning this feature on the other hand can lead to loss of data# on rotate files. It can happen that after file rotation the beginning of the new# file is skipped, as the reading starts at the end. We recommend to leave this option on false# but lower the ignore_older value to release files faster.# 这个选项关闭一个文件,当文件名称的变化。#该配置选项建议只在windows#force_close_files: false?# Additional prospector#-# Configuration to use stdin input#input_type: stdin?# General filebeat configuration options## Event count spool threshold - forces network flush if exceeded# spooler的大小,spooler中的事件数量超过这个阈值的时候会清空发送出去(不论是否到达超时时间)#spool_size: 2048?# Enable async publisher pipeline in filebeat (Experimental!)# 是否采用异步发送模式(实验功能)#publish_async: false?# Defines how often the spooler is flushed. After idle_timeout the spooler is# Flush even though spool_size is not reached.# spooler的超时时间,如果到了超时时间,spooler也会清空发送出去(不论是否到达容量的阈值)#idle_timeout: 5s?# Name of the registry file. Per default it is put in the current working# directory. In case the working directory is changed after when running# filebeat again, indexing starts from the beginning again.# 记录filebeat处理日志文件的位置的文件,默认是在启动的根目录下#registry_file: .filebeat?# Full Path to directory with additional prospector configuration files. Each file must end with .yml# These config files must have the full filebeat config part inside, but only# the prospector part is processed. All global options like spool_size are ignored.# The config_dir MUST point to a different directory then where the main filebeat config file is in.# 如果要在本配置文件中引入其他位置的配置文件,可以写在这里(需要写完整路径),但是只处理prospector的部分#config_dir:?############################################################################################################ Libbeat Config ################################### Base config file used by all other beats for using libbeat features?############################# Output ##########################################?# Configure what outputs to use when sending the data collected by the beat.# Multiple outputs may be used.output:?### Elasticsearch as outputelasticsearch: (这是默认的,filebeat收集后放到es里,可以自行修改,例如,若要filebeat收集后,然后到redis,再到es,就可以注销这行)# Array of hosts to connect to.# Scheme and port can be left out and will be set to the default (http and 9200)# In case you specify and additional path, the scheme is required: http://localhost:9200/path# IPv6 addresses should always be defined as: https://[2001:db8::1]:9200hosts: ["localhost:9200"] (这是默认的,filebeat收集后放到es里,可以自行修改,例如,若要filebeat收集后,然后到redis,再到es,就可以注销这行)
3. 执行 filebeat。
nohup ./filebeat-5.6.4-linux-x86_64/filebeat 2>&1 >/dev/null &
Docker 中访问 ES 集群
自建 Docker 集群
1. 拉取 filebeat 官方镜像。
docker pull docker.elastic.co/beats/filebeat:5.6.9
2. 根据数据源类型自定义配置文件
*.conf,放置在/usr/share/logstash/pipeline/ 目录下,目录可自定义。3. 运行 filebeat。
docker run docker.elastic.co/beats/filebeat:5.6.9
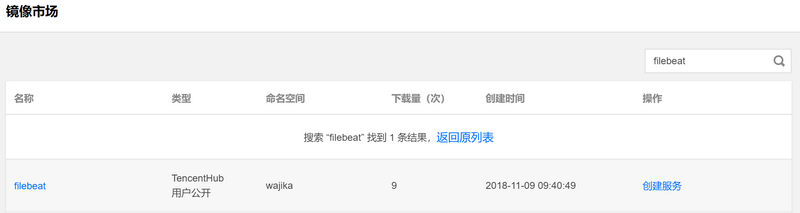
使用腾讯云容器服务
使用腾讯云容器服务部署 filebeat 的方式和部署 logstash 类似,镜像可以使用腾讯云官方提供的 filebeat 镜像。
配置文件说明
配置 filebeat.yml 文件,内容如下:
// 输入源配置filebeat.prospectors:- input_type: logpaths:- /usr/local/services/testlogs/*.log?// 输出到 ESoutput.elasticsearch:# Array of hosts to connect to.hosts: ["172.16.0.39:9200"]
?

